Yesterday I spent the day with a group of ladies from Happy Patchers in Wimborne for a sewing Saturday. We had a challenge to make a work bag for the occasion and there were a lovely selection of bags
First was the one in the photo just above, with pockets and the pattern inside. The second was the little black Japanese patchwork bag in the top picture and the green. red and yellow strippy one on the right side of the top photo came third. And mine? That's blue one in the bottom photo, next to the stripey one.
Grace showed us how to make a Post It holder, although it was made from card and paper, rather than fabric. It kept us quiet making them! Here they are displayed on the window ledge
And we also managed a bit of sewing too, all working on our own projects. I took my Scrappy Trip Around the World blocks and so managed to make 2 completed and 2 more blocks in strips waiting to re-cut. I'll share more photos when I upload the camera, all the above were taken with my phone.
Meanwhile
This is my magnolia called Stellata, the flowers only last a short time but we're surprised that there's so many flowers on this
And since Spring has decided to arrive the perennial wallflower has just burst into bloom, literally. Just love those purpley/orangey flowers.
21 April 2013
17 April 2013
Midweek stuff
This morning I am updating the blog before going off for an interview with an agency in Bournemouth. My current job will finish at the end of July and my contract is not likely to be renewed so I've started job hunting again. I think I've got a little complacent with keeping my CV up to date so I've had a bit of work to do getting that polished up at the weekend.
My postcards were sent out on Sunday and even though they went second class post one of the ladies in the group e-mailed yesterday that she got hers - amazing.
So here's my large piece of 'doodling' all trimmed up
and the six cards cut from the large piece
I didn't take a photo of the cards after edges had been finished off.
I really enjoyed the doodling, I might well be doing some more!
That done I am now working on a bag for this Saturday's challenge. I am joining some ladies in Wimborne for a belated IQD day - a good sewing day I hope.so I'll tray and share some photos of that on my next blog.
While loading photos from my camera (as I've been using my mobile for photos recently) I can across some from last month when we went out to The Vyne, a National Trust house near Basingstoke. It had been a mixed bag of weather that day so our visit started off sunny but by the end there was steady rain.
There were theses unusual cloth dolls dotted around the house with clues to keep children's interest.
A large hanging in the tea room sewn by member of the Embroiders Guild. As you can see some amazing work in that.
I could not resist taking a photo of these lovely hellebores, even though it was chucking it with rain!
Seeing photos of a day out has cheered me up already this morning!
08 April 2013
Sewing Sunday
Just one photo to show what I got up to over the weekend. This month's themed postcard swap that I signed up to is called 'doodling'. I chose to doodle with the sewing machine, I forgot the first rule of quilting that quilting 'shrinks' the fabric and cut the piece I was making to just 12.5 inches square - should have made another inch bigger. Just had to make smaller postcards from this one large piece.

I started of by using a twin needle to make the sections and discovered that not only could I sew straight stitch and zigzag but also a few fancy stitches too like the herringbone one in the bottom row of stitching. I then did some free machining mainly in straight stitch for most of the patterns and used free zigzag stitch for a couple of the sections (like the top right). I then cut the whole thing into 6 postcards.
I took the photo above with my phone, but later photos were with my camera, so can't show those until later.
That done, other makes for April will include a bag to be done for a challenge in a couple of weeks time and to make a start on my 'Coast' challenge.
Sue W- Posted using BlogPress from my iPad
02 April 2013
Postcard Tutorial
Yesterday Colette asked if it was hard to make a postcard. I thought that I've never made a tutorial before (which a lot of blogs do) so here goes. I would appreciate having some feedback just to see if it works.
Here is my method
What you need is a design for the front, 2 pieces of Bondaweb or fusible webb, a piece of pelmet or craft vilene (I think known as Pellon in the US) and a light coloured fabric for the back. All the pieces are 6.5" wide by 4.5" long.
I use a non stick cake liner, or you could use baking parchment to protect your ironing board cover and iron to fuse the pieces together, so with the front of your postcard face down place fusible web glue side down onto the back of the postcard front.
Iron and when cool remove the paper backing from the fusible. Next put the Pelmet Vilene on top of the fusible and iron.
The second piece of fusible is placed glue side down and ironed. As before, allow to cool before removing the paper backing. Then place the fabric for the postcard back on top and iron
So that's all the pieces fused together.
It now needs trimming to 6" x 4". I would often trim top and bottom, followed by the sides.
Then to the sewing machine for a zigzag edging. I don't use satin stitch as its too dense, but keep to a close-ish zigzag and when turning the corners reverse stitch before continuing along the length.
I go around the edge just the once and then over a few stitches on the first edge and fasten off with a locking stitch so there are no loose threads to sew in.
The back can be written on in ordinary gel pen and on this card I've just used plain calico, but I often use any light coloured fabric that I happen to have on which the address can easily be seen.
The backs can be quite versatile - you can stamp (which I've done badly here!) put on stickers, can back a fabric motif with fusible and iron it on. The "Postcard" and address label at the bottom is T-shirt transfer paper that I've printed and ironed on. Don't forget to leave an area on the right for the address of the recipient! The postcards can be posted as they are, just like normal postcards but if there is a lot of embellishment then they can fit into a cellophane card envelope.
Here's the finished front
To keep the ribbon more secure when posting I added some glue stick under it and put a few stitches in the ribbon loops.
That's another postcard done and I hope you enjoyed the tutorial.
01 April 2013
Fancy a slice of cake?
I bought this at one of the quilt shows last year. It was a kit from the Little Lavender Patch, but only got around to making it this afternoon and took an hour to make

I was quite impressed by that, looks good enough to eat! Fortunately being made of fabric it's calorie free!
Just to say that I have linked to Fresh Sewing Day at Lily's Quilts. I found that I can't make a link using Blogpress. No doubt there is a way, I just haven't found it yet.
After a nice long weekend, back to work tomorrow
Sue W- Posted using BlogPress from my iPad
Hope it works!
I'm without out home computer for updating the blog, so I'm trying out Blogpress this morning seeing how it goes. I've now finished the third bunny quilt which I showed in my last post. So (deep breath) here is the photo

Yay, that worked! I drew a bunny shape to copy onto fusible web and appliquéd the shapes. All the shapes were then machine blanket stitched around. Like the other two quilts this is also backed with fleece. All 3 will go to the local Project Linus group.
Yesterday afternoon I also worked on a couple of postcards for birthdays coming up in April as part of the BQLPC birthday group. Here they are

Yes, it is sideways but I did correct it on my phone before uploading and its gone sideways again. I could not resist using the lovely birdie fabric in my stash so it got another outing.
Here's the other one

That's a bit better. The ladies are from a Makower strip of little prints on fabric from a charm pack of Japanese fabrics.
April will see me working on a small quilt for a challenge called Coast. I have a idea for that, which I hope will work. I've also got a bag for another challenge with a local group's sewing day later this month.
Want to see a cute puppy photo? My son Jamie and his family have a 12 week old puppy called Brian and he is a cockerpoo (Cocker Spaniel/Miniature Poodle). The phot is a bit fuzzy and it was taken with my iPad (by Jamie)

Sue W- Posted using BlogPress from my iPad
Yay, that worked! I drew a bunny shape to copy onto fusible web and appliquéd the shapes. All the shapes were then machine blanket stitched around. Like the other two quilts this is also backed with fleece. All 3 will go to the local Project Linus group.
Yesterday afternoon I also worked on a couple of postcards for birthdays coming up in April as part of the BQLPC birthday group. Here they are
Yes, it is sideways but I did correct it on my phone before uploading and its gone sideways again. I could not resist using the lovely birdie fabric in my stash so it got another outing.
Here's the other one
That's a bit better. The ladies are from a Makower strip of little prints on fabric from a charm pack of Japanese fabrics.
April will see me working on a small quilt for a challenge called Coast. I have a idea for that, which I hope will work. I've also got a bag for another challenge with a local group's sewing day later this month.
Want to see a cute puppy photo? My son Jamie and his family have a 12 week old puppy called Brian and he is a cockerpoo (Cocker Spaniel/Miniature Poodle). The phot is a bit fuzzy and it was taken with my iPad (by Jamie)
Sue W- Posted using BlogPress from my iPad
26 March 2013
A bit of a catch up
From the post last time when 3 quilts were in progress I now have two quilts finished. I just kept it simple and bought some nice soft cream fleece to back the quilts with enough left over to piece for the third.
Here they are
The Boy Bunnies
The Girl Bunnies
This one is still in progress but the gingham squares looked rather plain so one evening last week I drew a butterfly shape and a balloon shape to make appliques to go on them. Today I found a picture of a simple rabbit shape so tomorrow I'll have rabbit appliques to go on the centre blocks next to the rabbits. Then just a case of stitching around the shapes. I found that skirt hangers make good hangers for displaying quilts and I might add something pretty them up a bit.
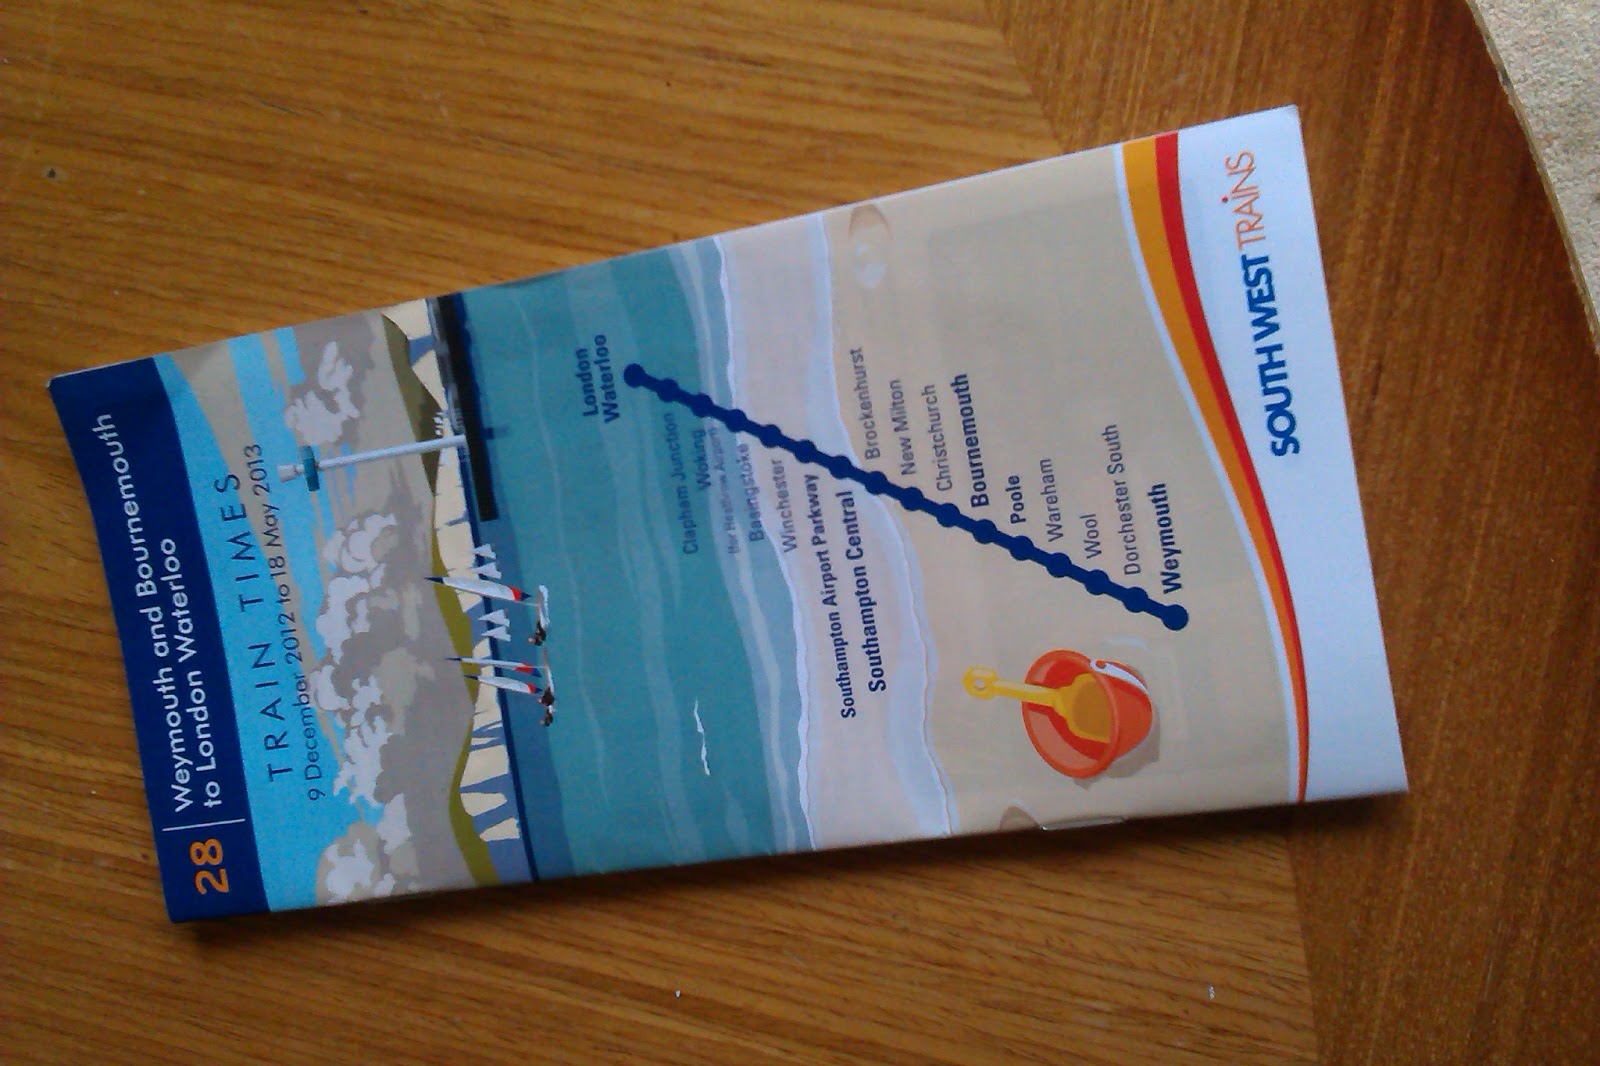
On Saturday I went with friends to the Quilters' Guild Region 3 Day in Brockenhurst and my friend Penny suggested taking the train from Poole. With the train ticket Penny also gave me this train timetable and I immediately liked the picture (yes it is sideways, I forgot to rotate the photo before uploading to Dropbox). It's reminiscent of one of those 1930's style railway posters showing the beach with the Isle of Wight in the background and sailing boats.
This gives me a bit of inspiration for a small quilt for the Region 4 challenge "Coast" and purchase of a few quarters of seaside fabrics while I was at the Region 3 day.
The speakers were Terry Donaldson and Kate Dowty from the Stitch Witches textile art group bringing along loads of quilts from their challenges, which have won prizes at quilt shows and have also held exhibitions too. I did take some photos but there are photos and more details about the challenges on the gallery pages of the Stitch Witches site.
The afternoon speaker, Judi Mendelssohn, one of the editors of British Patchwork and Quilting magazine. She had a difficult journey due to the snow, rain and goodness knows what weather to get to Brockenhurst and was not sure whether she would travel. (This last weekend and into this week a lot of the UK is covered in snow which is causing havoc around the country, fortunately along the south coast we are lucky not to have the white stuff, but the temperatures are bitterly cold.) She was a very entertaining speaker again with loads of quilts to show from numerous Ikea bags. (Sorry about the heads!). Just loved this New York Beauty quilt. This would be a technique she taught to a workshop on the Sunday).
Sunday saw David and I going to Southampton to the Mayflower Theatre to see the Hairy Bikers "Larger than Live" roadshow. A packed theatre, though I think we were a little disappointed with the show, thinking there would be more cooking, but there was a lot of larking about and clips from the television shows. But it got us out to the theatre (don't do enough of that).
I haven't blogged very much this month but hope I can get some stitching in over the Easter holiday. maybe I might even have the third bunny quilt done.
16 March 2013
INTERNATIONAL QUILTING DAY
Today is International Quilting Day and I am not able to be part of it, sadly. So whatever you do today I hope today is an enjoyable sewing one. Being rainy today it would be nice to be in the sewing room and getting stuff done, but I will be visiting relatives so not a stitch will be sewn, but I will be thinking of friends enjoying their day at Sturminster Marshall Village Hall today.
But is has been a sew-y week. David had spent some time in Yorkshire this week with work, so I had a couple of evenings busying myself. I was given some remnant fabric of some cute bunnies and matching gingham fabric in (originally in blue) and made 2 nine patch tops but felt they needed to be bigger but didn't have enough of the blue so asked the Bourne Quilters if they had more. They did and a carrier bag was found on my doorstep one day with more rabbit fabric and assorted coloured ginghams. I've now made the quilt tops bigger and now making a third top. So here are my efforts.
The Boy bunnies - I'd used the blue gingham fabric, but some of the fabric is a bit old and slightly faded so is a bit patchy
The Girl bunnies - one of the gingham pieces, the green was a decent size so decided to unpick the blue square and replace with the green, and as you can see there are a couple of bunnies in green dresses.
And with bits and bobs left over another quilt top is in progress.
I will get some fleece to back these little quilts, so keeping it simple. They will go to the local Project Linus group.
The New Year resolution didn't last too long. March has seen a few magazines like this little lot here
(sorry it's sideways)
plus there's The Quilter magazine from the Quilters' Guild (part of the membership) and Fabrications (I subscribe to that one) too. Oh dear, they are starting to breed again.
07 March 2013
Bits and Bobs (or Odds and Sods)
Since my last posting life has past in a blur, but I now have a couple of days holiday to use up leave today and tomorrow. The weekend ahead will see a trip to Bristol to see my daughter Sarah for the day.
On Tuesday at work (I work for the Borough of Poole council) I found this by the entrance to the Council Chamber
Not where one would normally see a quilt, so after getting a coffee I went back there with my phone to take this photo. This quilt was presented to the Council in 2002 and made by 6 people whose names are listed on the back, but I didn't recognise any of them, so I am wondering whether they are embroiderers rather than specifically quilters. The main quilt was painted and stitched, hand stitched large seed stitches on the land and the edges of the sea bit was machine stitched but I can't remember how the rest of the sea was stitched.
The pictures were made separately and may have been stitched over mount board before being appliqued onto the quilt. They are of, from the top, Coat of Arms for Poole, the memorial to Lord Baden-Powell on Brownsea Island, (not sure of the white building at the top), The Customs House. In the middle on the left is the Poole Arms. On the bottom the pottery kilns at Poole Potter (long gone) the entrance gates to Poole Park, some boat rigging, and the RNLI flag (the RNLI headquarters and college are based in Poole). What a find and if I get more information about this quilt I put it on this blog.
Last month I sent out Flying Geese postcards and these are the ones I've received from the swap
From top left clockwise, from Inge, Pauline, Jan and Jacquie. I enjoy the different interpretations from this block. I did have 2 to spare from making this so one is in my folder and another went to the lovely Sue from Quilt Times.
Talking of my postcard folder, where I've kept samples and spares, is a handy thing to take with me when people ask about fabric postcards. I'ts just a plain A5 one with pocket pouches inside
There are also some unfinished postcard tops and thinking that I ought to do some finishing off
Here's one top which was finished off yesterday to show a friend how the postcards are made
A nice bit of fabric weaving
And used a nice bit of indigo dyed fabric from years ago, I looked later at that and thinking I should have made a card front out of that, it looks like the sea and sky, why didn't I think of that earlier! Oh well, it's done now.
I'm still knitting and am having a go at a moebius cowl, one of those loopy things that goes around the neck. I got a very basic pattern here with links to You-tube videos for the cast on and the I-cord (was once known as French Knitting to you and me) finish. I've knitted this up and getting to the end now, so this is what is looks like
It's knitted in Sirdar Click, a double knitting yarn with colour changes and it's funny that my yarn choices, a bit like my thread choices usually seem to the variegated.
As I'm a member of the regional committee of the Quilters Guild and found that another committee member Deborah, has a blog too, Deborah, The Daisychain Quilter. I see that she's posted a link to here too, thanks Deborah.
24 February 2013
A Day to Dye
On Tuesday evening a had a trawl around the blogs on Quilting Bloggers and came across this one, called Quilt Routes, authored by Deborah O'Hare, who does lots of luscious things with fabric. In particular was a page devoted to Fabric Paint Techniques. So come Wednesday morning, (Wednesday is my work day off) I went to the utility room, firstly to tidy the worktop there and then get my fabric paints out. I am impatient with proper dyeing as I like to see results and not have to wait to see if something has worked or not, so fabric painting suits me better.
I had a go at the layering technique but I think the paint that I have is thicker and I took it straight out of the little pot not having anything to hand to pour into. Also with my clearing out I found that some paints have become old and not much left in them, but hey ho, this is all part of the fun. I had some blue and want to mix in some yellow, which by this time was all used up, so I added some limey green Setacolour paint that had some shimmer.
Above is what the fabric looked like just painted. This was folder while wet and I put it over the airer on top of a plastic bag until dry
This was the back (I liked the effect better)
and the front, with the limey paint with shimmer, I like that little bit of sparkle.
I'd also used some blue, yellow and a few dabs of purple on very damp cloth and rubbed together to merge the colours and added some sea salt which produced this lovely piece of fabric, this was another of Deborah's techniques, but went a little mad on the salt. Think I'll be a bit more subtle next time, not bad though.
Some time ago I was shown shaving foam dyeing, and I still had some shaving foam in the cupboard, but it is old and a bit flat but still used this until I couldn't get any more out of the paint and foam
Below is the first bit of dyeing, a bit blobby, the second one the paints merged a bit to give a marble-y effect and the bottom photo shows more and even more merged effect this time on paper
I then had a go a a technique on Terri Stegmiller's blog, from which she made Valentine's cards. I have a few mask stencils and chose a flowery one on hand. I only had one spray colour in lilac so sprayed that over the stencil. I then tried to water down a metallic bronze Stewart Gill paint, but it's too old and thick to use and ended up with blotches on another card, so I think that paint will have to go. The heart was made from a previous fabric paint exercise.
None of it may be perfect but I had fun with playing around.
Yesterday I was invited to join some friends for a Sewing Saturday, which was a nice relaxing day of sew and chat. My workshop machine hadn't been used for a while and it was a bit noisy but after warming up a bit was sewing like a dream. I made 3 more Scrappy Trip blocks to add to the 11 already made with another in progress.
Subscribe to:
Posts (Atom)