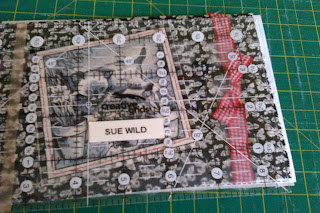
Yesterday Colette asked if it was hard to make a postcard. I thought that I've never made a tutorial before (which a lot of blogs do) so here goes. I would appreciate having some feedback just to see if it works.
Here is my method
What you need is a design for the front, 2 pieces of Bondaweb or fusible webb, a piece of pelmet or craft vilene (I think known as Pellon in the US) and a light coloured fabric for the back. All the pieces are 6.5" wide by 4.5" long.
I use a non stick cake liner, or you could use baking parchment to protect your ironing board cover and iron to fuse the pieces together, so with the front of your postcard face down place fusible web glue side down onto the back of the postcard front.
Iron and when cool remove the paper backing from the fusible. Next put the Pelmet Vilene on top of the fusible and iron.
The second piece of fusible is placed glue side down and ironed. As before, allow to cool before removing the paper backing. Then place the fabric for the postcard back on top and iron
So that's all the pieces fused together.
It now needs trimming to 6" x 4". I would often trim top and bottom, followed by the sides.
Then to the sewing machine for a zigzag edging. I don't use satin stitch as its too dense, but keep to a close-ish zigzag and when turning the corners reverse stitch before continuing along the length.
I go around the edge just the once and then over a few stitches on the first edge and fasten off with a locking stitch so there are no loose threads to sew in.
The back can be written on in ordinary gel pen and on this card I've just used plain calico, but I often use any light coloured fabric that I happen to have on which the address can easily be seen.
The backs can be quite versatile - you can stamp (which I've done badly here!) put on stickers, can back a fabric motif with fusible and iron it on. The "Postcard" and address label at the bottom is T-shirt transfer paper that I've printed and ironed on. Don't forget to leave an area on the right for the address of the recipient! The postcards can be posted as they are, just like normal postcards but if there is a lot of embellishment then they can fit into a cellophane card envelope.
Here's the finished front
To keep the ribbon more secure when posting I added some glue stick under it and put a few stitches in the ribbon loops.
That's another postcard done and I hope you enjoyed the tutorial.


Thanks Sue. If I ever get round to trying to do these, I know just where to come for instructions.
ReplyDeleteVery clear tutorial, Sue. Lovely card too!
ReplyDelete